
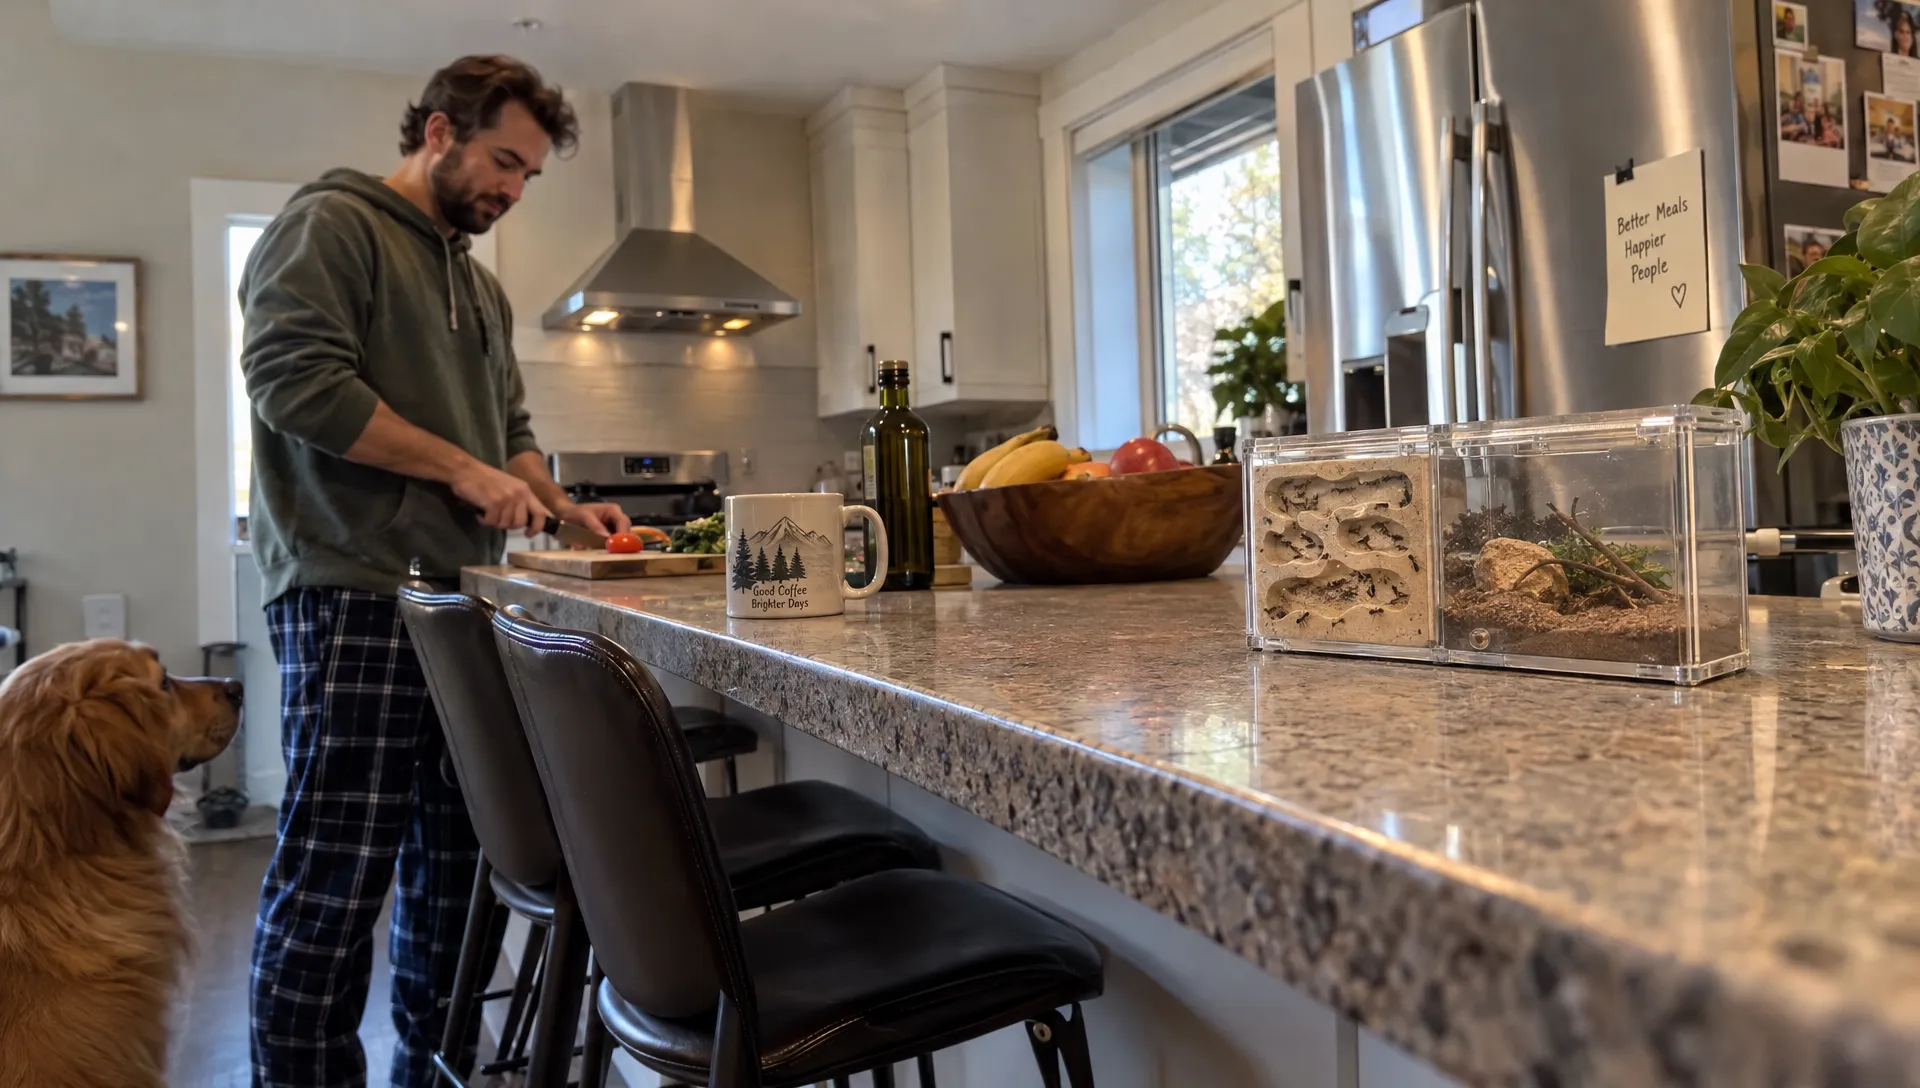
Setting up ant farms starts with matching the habitat to the colony you have, not filling the biggest enclosure you can find. A queen with a few workers usually needs a small, dependable nesting space, access to water and a secure place to forage. Extra chambers and elaborate decorations can wait.
The safest approach is to prepare and test the enclosure before the ants arrive, then let the colony settle without forcing a move. This guide walks through that process, from choosing your first colony to managing feeding, hydration and future expansion.
1. Choose a colony you can care for year-round
For a first colony, look for a correctly identified species with clear care instructions. Ask the seller for its scientific name, current worker count, queen status and seasonal requirements. An established, queenright colony, meaning one with a reproductive queen, removes some of the uncertainty of starting with a newly mated queen.
Native North American ants such as Lasius neoniger and some Camponotus species are worth discussing with a knowledgeable Canadian supplier. They are not interchangeable: worker size, growth rate, nesting preferences and winter dormancy requirements differ. Larger carpenter ants can be easier to observe, but their colonies often develop slowly.
For first ant farms, manageable care requirements matter more than unusual colours or rapid growth. Avoid choosing a species until you know how you will provide its required temperatures and any seasonal rest period.
Check collection and transport rules first
Before collecting, purchasing or transporting live ants, check the requirements that apply to the species and destination. For imports, start with the Canadian Food Inspection Agency, then confirm any applicable provincial or territorial restrictions. Collection may also require landowner permission and can be prohibited in protected areas.
A seller offering shipping does not, by itself, establish that a particular colony can legally cross a border. Never order unidentified ants or assume that a species found elsewhere in Canada is appropriate to release locally.
2. Match the housing to the colony’s current size
A formicarium is the nesting area where ants keep their queen and brood. The outworld is the accessible area where they collect food and deposit waste. These can be integrated into one unit or connected with tubing.
Successful ant farms provide enough usable nesting space without opening a large network of empty chambers. Excess space can become a rubbish area, making food waste and mould harder to manage. There is no reliable universal rule such as “50 ants per farm” because body size, brood volume and chamber design vary.
| Housing option | When it makes sense | What to check |
|---|---|---|
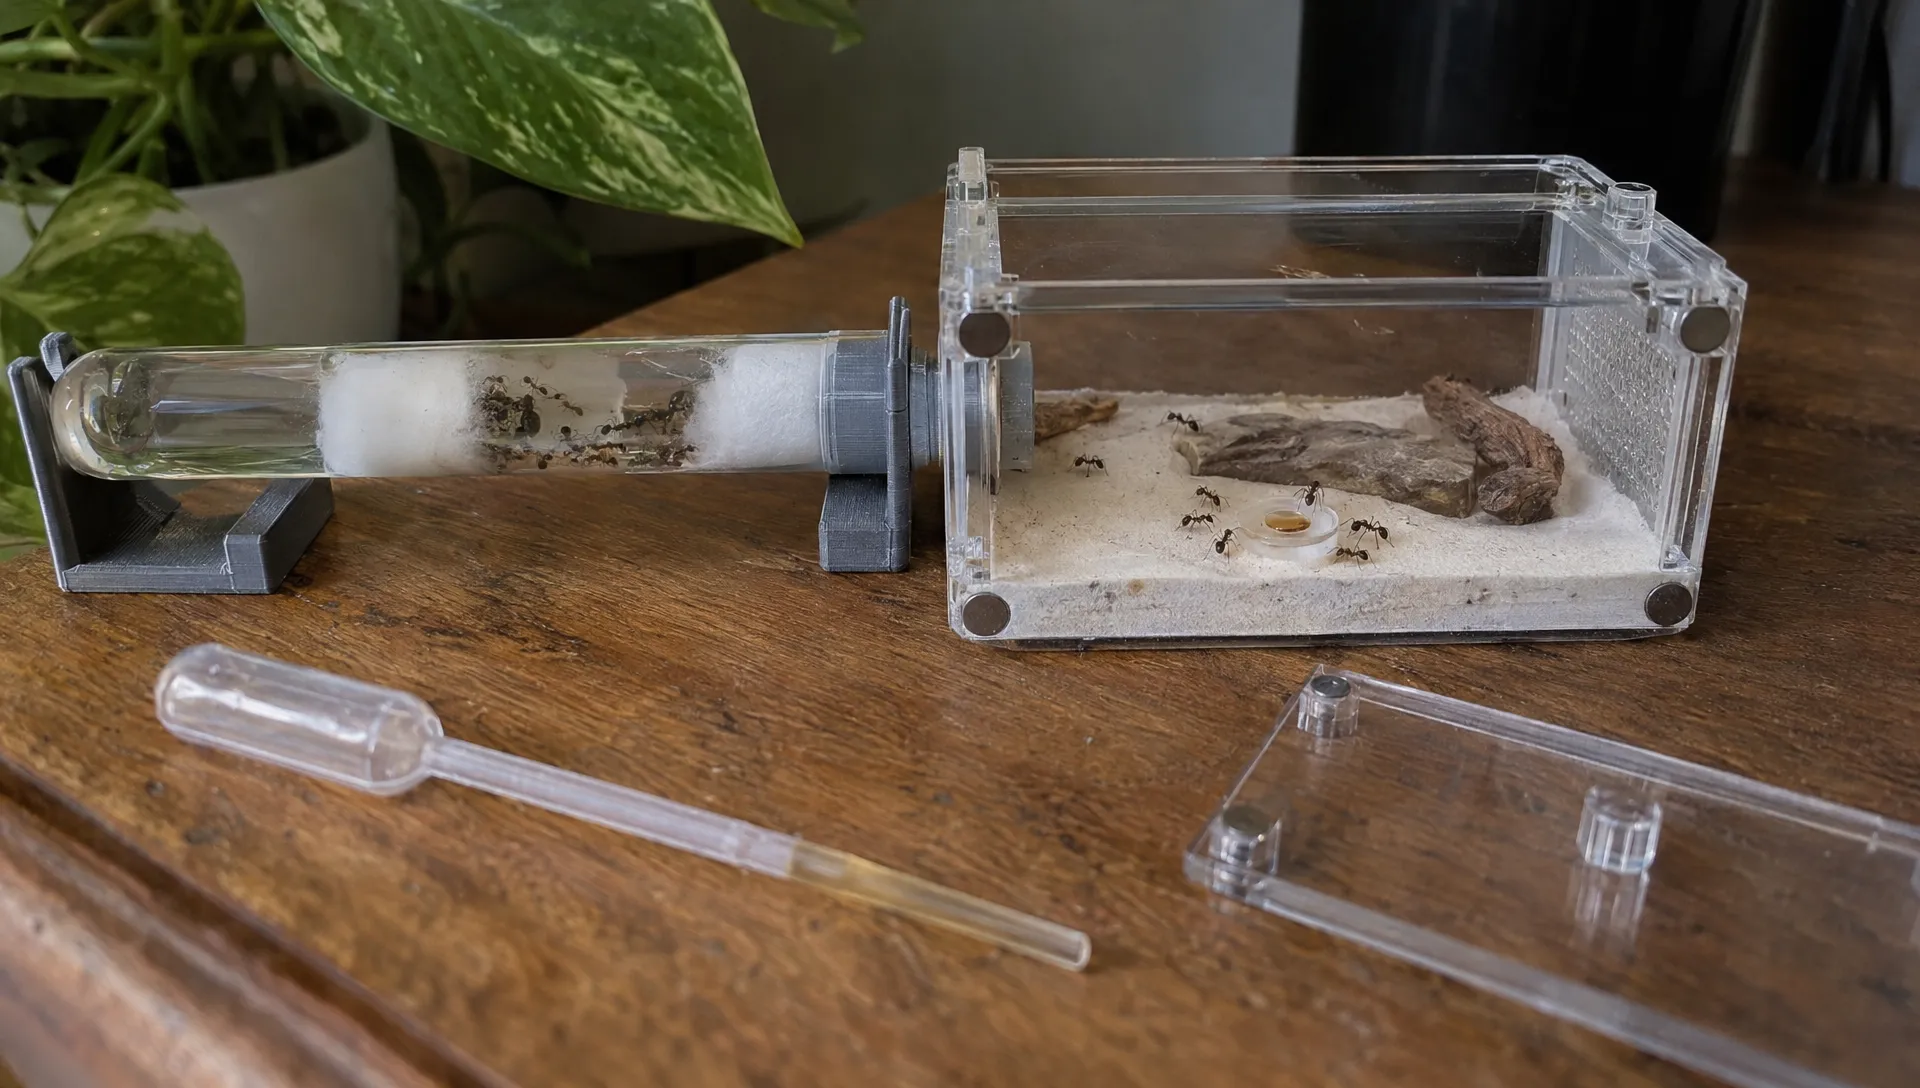
| Test-tube nest with a small outworld | A founding queen or small colony already comfortable in a tube | Reliable water reservoir, stable tube support and safe feeding access |
| Integrated starter kit | A colony suited to the kit’s smallest usable nesting area | Whether unused chambers can remain closed and how hydration works |
| Separate nest and outworld | A keeper who wants independent access and flexible expansion | Compatible connectors, secure tubing and easy cleaning |
| Soil or sand setup | A species and keeper suited to less-visible nesting | Moisture control, structural stability and access for maintenance |
A starter kit can simplify compatibility, but “complete” does not necessarily mean suitable for every colony. A separate setup offers flexibility but requires more checking of tubing sizes and connections.
Gel-filled display habitats are not a good default for long-term colony care. Choose housing that supports species-appropriate moisture, ventilation and feeding instead.
3. Prepare the location and essential supplies
Choose a stable surface away from direct sunlight, speakers, frequent knocks and household sprays. Sun through a window can overheat a small enclosure even when the room feels comfortable. Keep the setup out of reach of pets and young children.
Before opening a transport container, have these essentials ready:
- Suitable housing: A nest matched to the colony, with an accessible feeding area.
- Water and feeding equipment: A dependable drinking source, small feeders and species-appropriate food.
- Escape protection: A close-fitting lid, suitable ventilation mesh, secure connectors and an appropriate barrier if needed.
- Maintenance tools: Feeding tweezers, a pipette and dedicated cleaning supplies.
- Care instructions: The species’ temperature, moisture, diet and dormancy requirements.
Keep equipment dedicated to the colony rather than borrowing utensils that may carry detergent, oil or food residue. Avoid insecticides, essential oils and fragranced cleaners around the habitat.
Plan access as carefully as display space. Ant farms need room for opening lids, replacing water and removing leftovers without disturbing the nest. Position tubing where it cannot be snagged, and keep a secure temporary container available for maintenance emergencies.
4. Test ant farms before introducing the colony
Assemble the empty enclosure according to its instructions. Check joins, lids, ventilation openings and unused ports, paying particular attention to gaps small workers could pass through. A barrier is a backup, not a substitute for a properly fitted enclosure.
Add water only to the intended hydration points. Observe how it spreads through the nesting material and check for leaks, puddles or persistent condensation. Where practical, run the empty setup through a full day before introducing ants.
The goal is usually a usable moisture gradient, not uniformly wet chambers. The correct balance depends on the species and nest material. A gypsum nest, an acrylic nest and a test tube do not behave the same way.
Keep a suitable test-tube nest in service
If the colony arrives in a sound test-tube nest, it may not need a new nest immediately. Secure the tube in a small outworld, keep its entrance accessible and provide darkness around the nesting section without blocking ventilation.
For reservoir preparation and cotton placement, follow the detailed guide to preparing ant tubes for founding queens. Test any replacement tube before offering it to the colony.
Do not add extra water to an occupied tube by guessing where it will go. Flooding can be more dangerous than leaving a functioning nest undisturbed.
5. Introduce the ants without forcing a move
Before opening the colony’s container, close the room’s windows, clear the work surface and confirm that the outworld is secure. Place or connect the transport tube so the ants can enter the feeding area safely, following the supplier’s instructions.
Avoid shaking ants into chambers, pulling a queen out with tweezers or using heat to drive a move. If the original nest remains safe, allow the colony to choose when to relocate. A darkened new nest and a secure connection are preferable to repeated interference.
New ant farms often appear quiet at first. A small colony may have little reason to forage during the hours you watch it. Brief observations are more useful than repeatedly lifting covers to check the queen.
Keep separate colonies separate, even when they look like the same species. Combining unrelated workers or queens can cause fighting. Likewise, do not add garden workers to increase the population of a purchased colony.
If the transport tube is cracked, leaking or nearly out of water, contact the supplier promptly and offer a prepared replacement. An immediate risk may require intervention, but routine relocation should remain voluntary wherever possible.
6. Provide water and an appropriate feeding routine
For many commonly kept ants, liquid carbohydrates fuel worker activity while protein supports brood development. Plain drinking water should also remain available. Seed-harvesting species and other specialists require a diet tailored to their biology, so use the species’ care sheet rather than a universal menu.
Start with small portions. Offer sugar solution in a suitable feeder or as a very small, controlled amount that workers cannot become trapped in. Large exposed droplets and open water dishes can drown small ants.
Use appropriately sourced feeder insects rather than insects collected from areas that may have been treated with pesticides. Pre-killed portions make it easier to feed a small colony without introducing struggling prey. Remove uneaten moist food promptly, generally by the following day, and sooner if it spoils.
Feeding ant farms by appetite works better than repeatedly adding food that goes untouched. Record what the workers actually collect, then adjust portions. The guide to choosing ant food for each stage of colony growth explains how needs change as brood and worker numbers increase.
If children are helping, explain that sugar water is insect food, not a drink to taste. Human nutrition and oral health are different subjects; a practice offering children’s dentistry, such as Beenleigh Dental, can advise on tooth-friendly habits for people. Keep colony feeders and utensils separate from family food.
7. Check moisture and temperature without constant disturbance
Use the species’ recommended temperature range rather than a single number intended for all ants. Measure conditions near the habitat instead of relying entirely on the thermostat across the room.
Supplemental heating is not automatically necessary. If it is appropriate, use suitable equipment with thermostatic control and leave a cooler area available. Do not heat a water reservoir directly or warm the entire enclosure without an escape from the heat.
Moisture needs the same restraint. Watch the reservoir or hydration system, look for standing water and check that ventilation remains unobstructed. Ants moving brood can be normal behaviour, but repeated crowding at the only damp edge may justify reviewing the setup.
Stable ant farms are easier to maintain than habitats repeatedly adjusted in response to a single observation. Keep a simple log of water additions, food intake, room conditions and any changes you make. Change one variable at a time unless there is an immediate hazard.
For temperate species, ask about diapause before winter arrives. This seasonal rest can affect temperature and feeding requirements. Do not improvise by placing a colony outdoors or moving it directly into a refrigerator without a species-specific plan.
8. Use a simple first-week care schedule
On arrival: Inspect the colony and its water supply, secure its housing and follow the supplier’s settling-in instructions. For a colony with workers, make water and suitable food accessible without repeatedly opening the nest.
During the first few days: Make brief checks for escapes, leaks, empty feeders and spoiled food. Avoid rearranging decorations or uncovering the queen simply to encourage activity. Photographing the setup from outside can help you compare changes without disturbing it.
By the end of the week: Review food consumption and whether maintenance is straightforward. Note any recurring condensation, inaccessible waste or fittings that shift when you open the lid. Fix equipment problems carefully rather than accepting them as part of the routine.
A lone founding queen needs a different schedule from a worker colony. Fully claustral queens typically raise their first workers using stored reserves, while semi-claustral queens need food during founding. Confirm which strategy applies before deciding whether and how to feed.
For newly established ant farms, a successful first week means dependable water, secure containment and minimal unnecessary disturbance, not a dramatic increase in visible activity.
9. Expand only when the colony needs it
Assess the occupied nesting area rather than counting workers alone. Consider worker size, brood volume and whether ants can use chambers normally. Regular crowding throughout suitable nesting space can indicate that more room is needed.
Before expanding, rule out a moisture or temperature problem. A colony clustered in one corner may be choosing the only comfortable conditions rather than running out of space. Opening more chambers will not correct a dry nest or an overheated surface.
With modular housing, add a modest amount of usable space and keep unnecessary sections closed where the design allows. Expand the outworld separately if feeding and waste removal become difficult before the nest itself is crowded.
Responsible ownership also includes an exit plan. If you can no longer maintain the colony, contact the original supplier or an experienced keeper about lawful rehoming. Do not release purchased or long-kept captive ants outdoors, even if they were sold as native. Confirm the species and any transfer requirements before arranging a new home.
Frequently asked questions
How many ants should I put in my first habitat? Start with one compatible colony and size the enclosure around it. There is no universal minimum worker count or fixed number per chamber. A queen and a few workers may be best kept in a test-tube nest connected to a small outworld.
Do ant farms need a queen? A worker-only group can be observed for a limited period, but it will not develop like a normal queenright colony. For long-term colony keeping, choose an appropriately identified colony with a reproductive queen unless you are deliberately caring for a worker-only group.
How soon should I move ants into a larger nest? Not simply because the new nest has arrived. Keep a small colony in its existing suitable nest until space, water availability or another genuine husbandry need justifies a move. Offer safe new housing without forcing relocation.
Can I collect ants from my garden? Check local rules and obtain permission where required. Collecting random workers will not usually establish a lasting colony. Identification, queen status and collection method all matter, and digging up nests can injure ants and damage habitat.
What should I arrange before travelling? Leave written care instructions, tested water supplies and clearly measured feeding portions. Have a knowledgeable person check the colony rather than assuming an unattended feeder will cover every problem. Boarding may be an option when suitable care is unavailable at home.
Get help matching the setup to your colony
Before buying equipment, write down the species, worker count, current housing and expected room conditions. Those details are more useful than choosing by enclosure size alone.
Ant Farms Calgary offers starter kits, live colonies, modular habitats and personalised kit recommendations, with WhatsApp and email support. Ask which setup suits your colony now, what can stay closed until later and how to maintain it through its first seasonal cycle.




Leave a comment