
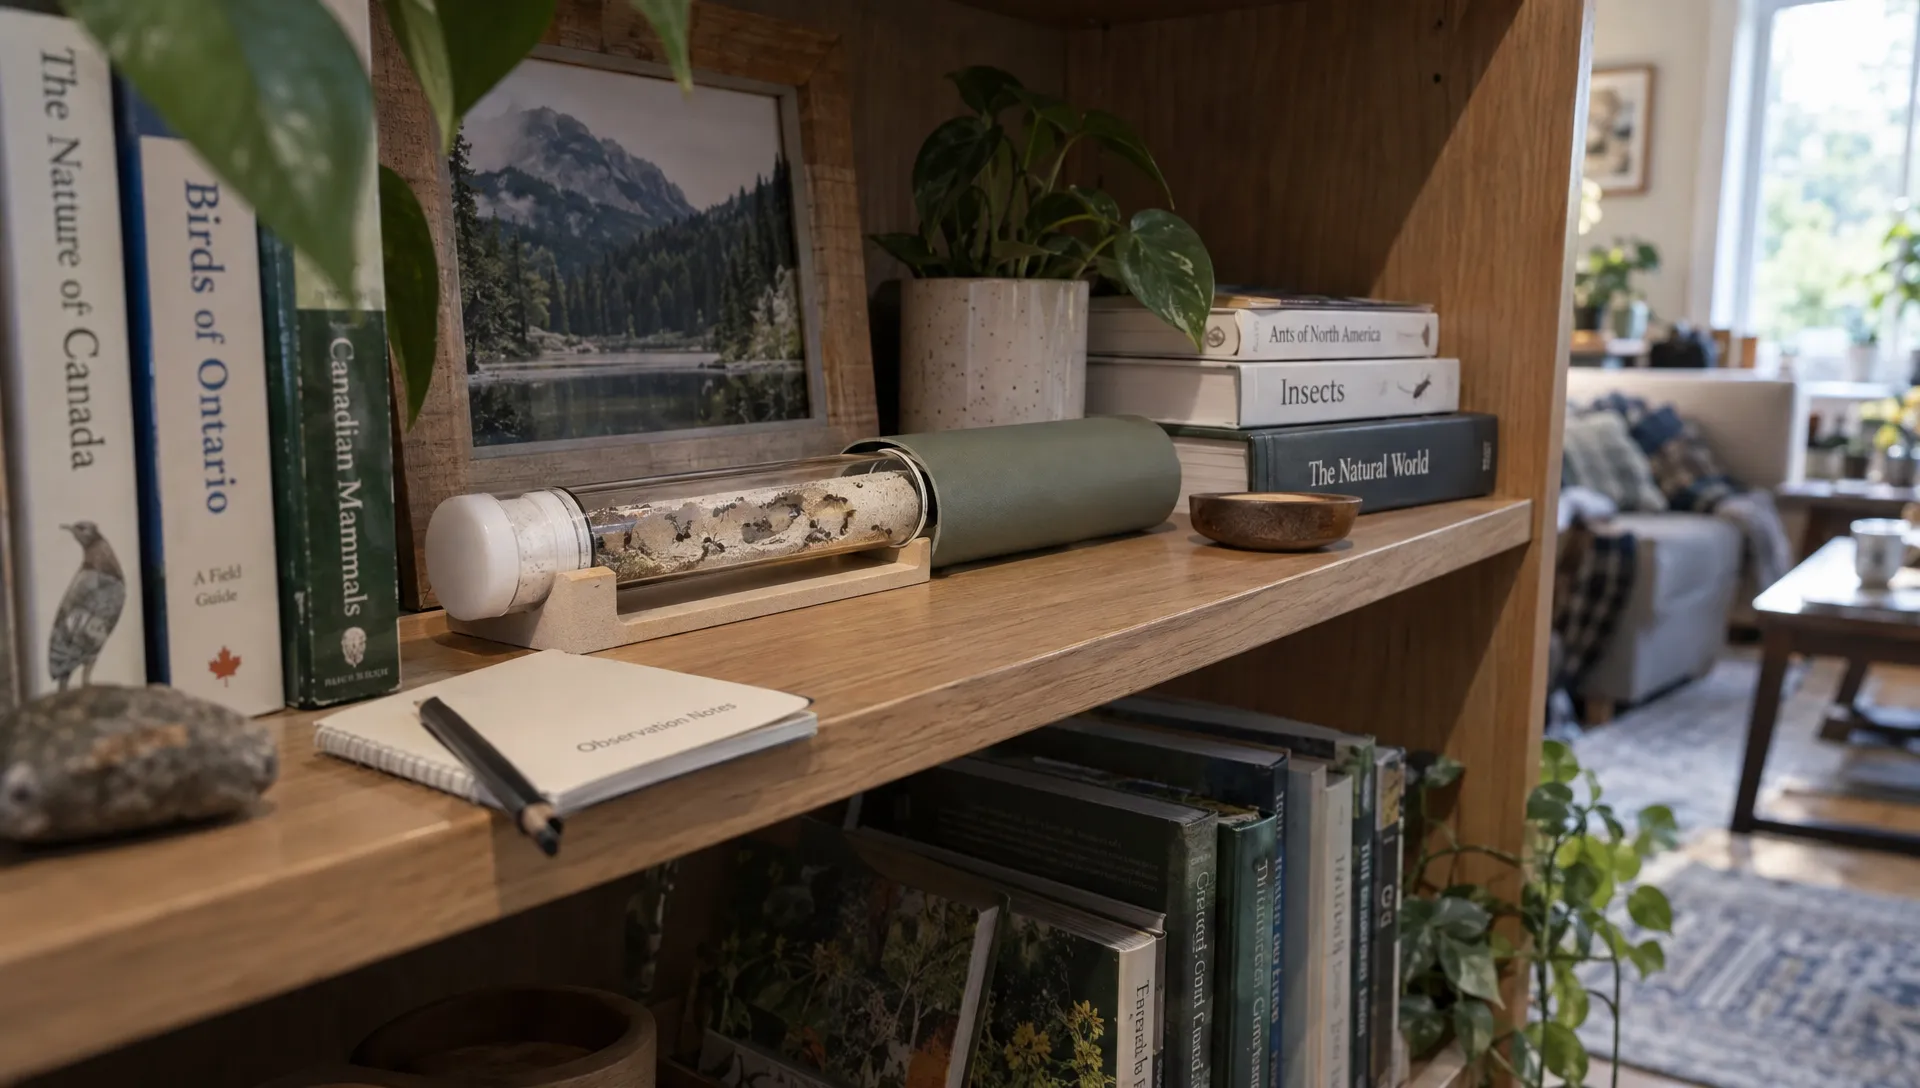
Properly prepared ant tubes give a founding queen a secure retreat, access to water and a humid nesting chamber without the empty space of a full-sized formicarium. For many commonly kept species, a simple water-reservoir test tube is a suitable first home.
The basic arrangement is straightforward: water at the closed end, a cotton barrier, an open nesting chamber and a breathable cotton entrance plug. The details matter, though. A loose water barrier can flood the chamber, while unsuitable feeding or constant disturbance can undermine an otherwise sound setup.
What a founding queen needs
A founding queen generally needs moisture, security and conditions appropriate to her species. She does not usually need substrate, decorations or a large nest at this stage. A clear tube also lets you check water and brood without dismantling her home.
The nesting chamber should have a dry floor with moisture available through the reservoir cotton. Humid air is useful; standing water around the queen and her eggs is not.
Before preparing a nest, identify the species as closely as possible and establish whether the queen is fully claustral or semi-claustral. This determines whether she normally raises her first workers using stored reserves or needs food during founding. Seasonal requirements, including diapause in many temperate species, also affect care.
Choose ant tubes and clean supplies
Use an intact, smooth-sided test tube large enough for the queen to turn comfortably. Glass is easy to inspect and clean, although suitable clear plastic tubes can also work. Avoid scratched, cracked or previously contaminated containers.
A tube roughly 100 to 150 mm long is a common practical choice, but the queen’s size matters more than a fixed measurement. Leave enough space for a water reservoir and a nesting chamber several centimetres long.
| Supply | What to choose | What to avoid |
|---|---|---|
| Test tube | Clean glass or suitable clear plastic with a smooth opening | Cracks, sharp edges or unknown chemical residues |
| Reservoir cotton | Plain, absorbent cotton without fragrance or lotion | Cosmetic pads containing added products |
| Entrance plug | Plain cotton that fits securely while allowing airflow | Airtight caps or tightly sealed stoppers |
| Water | Fresh, potable water | Sugar water, fertiliser solutions or scented additives |
| Cover and support | Removable opaque sleeve and a stable tube holder | Materials that block ventilation or let the tube roll |
Wash a reused tube with mild, unscented detergent, rinse thoroughly and let it dry. If its previous contents are unknown, choose a different tube rather than trying to make it safe for a queen.
Assemble the setup before adding the queen
1. Fill the water reservoir
Fill approximately one-third to one-half of the empty tube with plain water. The exact amount depends on tube length and how much nesting space your queen needs.
When preparing ant tubes, keep food out of the reservoir. Sugar water can spoil and should not replace the queen’s clean water supply. Any feeding should happen separately and according to the species’ requirements.
Prepare at least one spare tube if you have the supplies. Having a tested replacement ready is useful if you discover a leak or need to move a queen later.
2. Fit the reservoir cotton
Roll a piece of plain cotton into a plug slightly wider than the tube’s opening. Gently push it down until it meets the water, using a clean, blunt tool that cannot scratch the tube or damage your hands.
The plug should fit snugly against the walls, with no obvious channel around its edge. Its water-facing side should become saturated, while the chamber-facing surface should be damp rather than surrounded by a puddle.
Do not use a fixed cotton quantity for every tube. Tube diameter and cotton density vary. The finished barrier needs to hold the reservoir back while allowing moisture to reach the queen-facing surface.
3. Test the tube horizontally
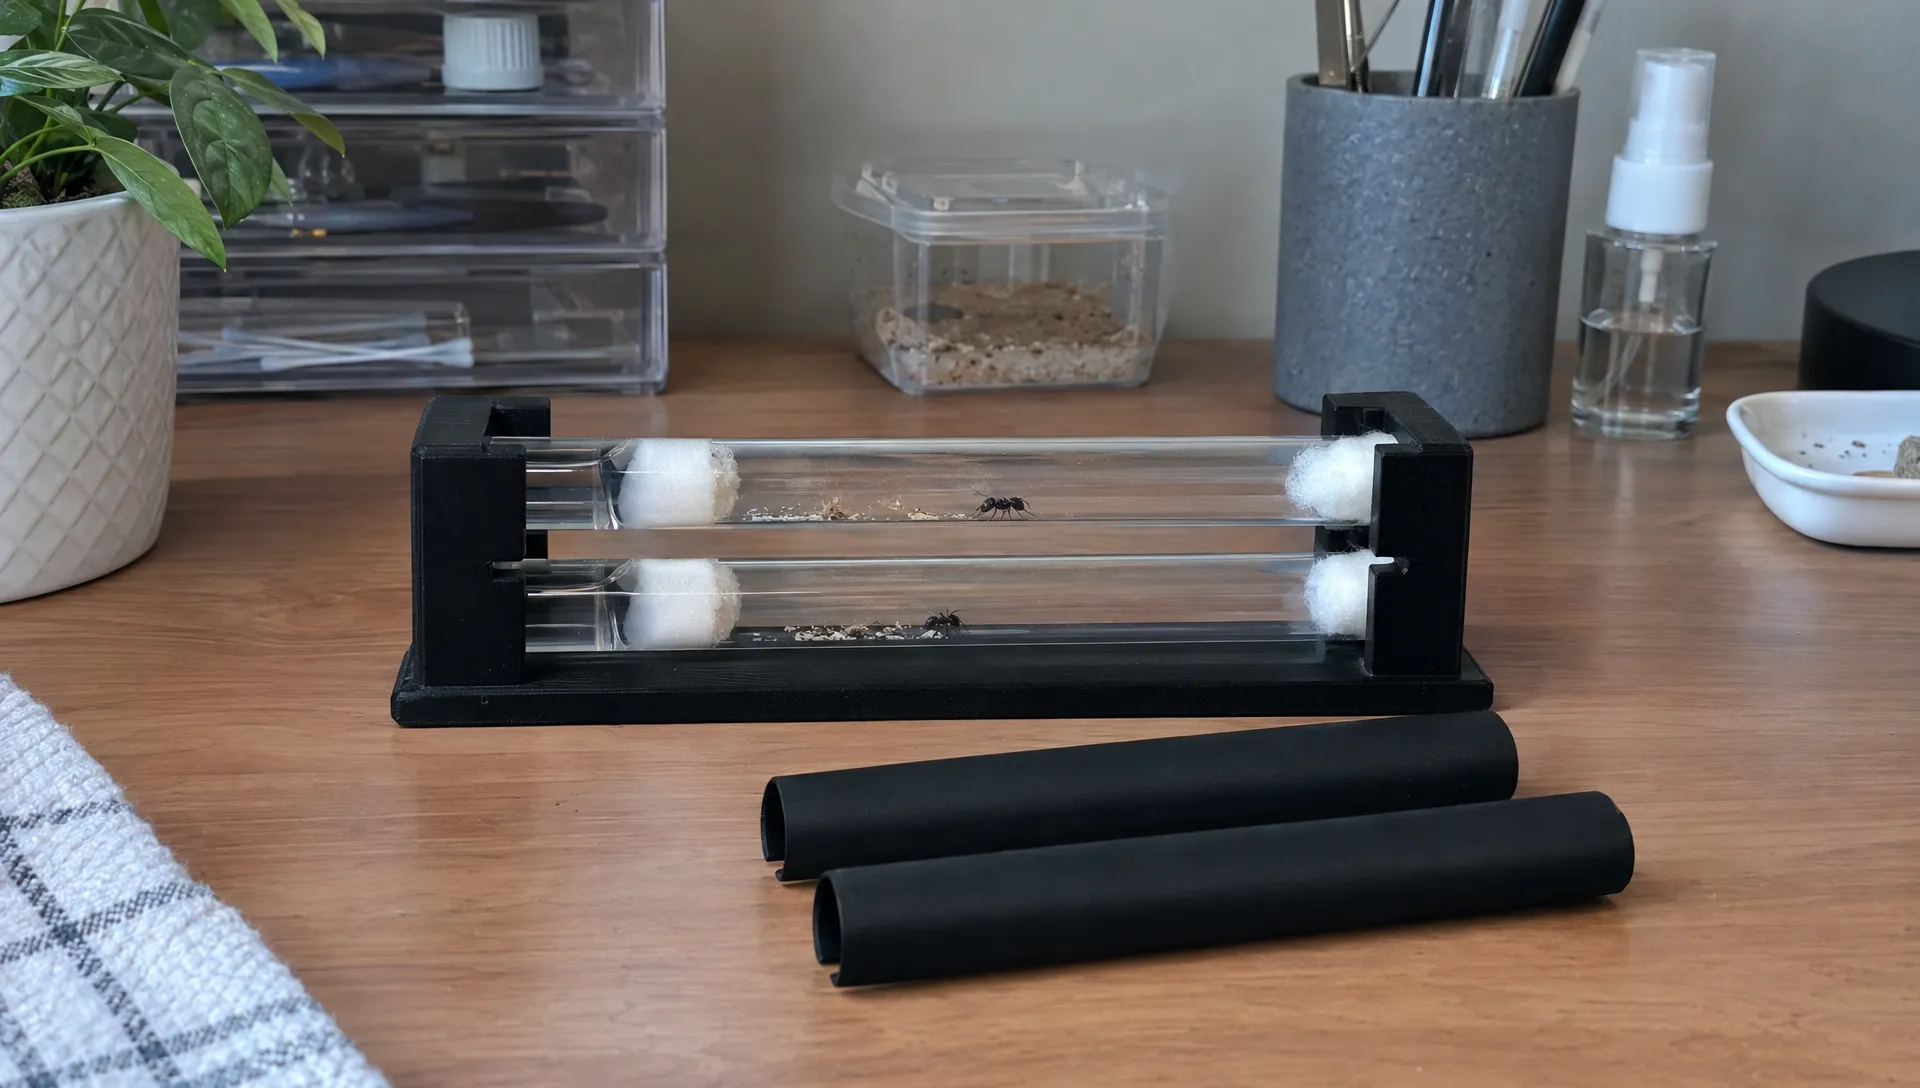
Place the empty setup horizontally in a holder that prevents rolling. Leave it for several hours, preferably overnight, before introducing the queen.
Check ant tubes in the position they will actually occupy, not just upright in your hand. Watch for water creeping around the cotton, collecting on the chamber floor or reaching the entrance. A damp cotton surface is expected; a moving droplet or expanding puddle needs attention.
If it leaks, empty the tube and rebuild the barrier with a better-fitting plug. Do not plan to correct a faulty reservoir after the queen has settled inside. Testing first is much less disruptive.
4. Introduce the queen and close the entrance
If your queen already occupies a safe transport tube with adequate water, she may not need an immediate move. Avoid transferring her simply to make the setup look neater.
When a transfer is necessary, work over an escape-resistant container and allow her to walk into the prepared tube where possible. Do not grab her by the legs or abdomen, shake her out or pour water into an occupied chamber.
Close the opening with a separate cotton plug that fits securely but remains breathable. Push it in far enough that it will not fall out during gentle handling, while keeping enough cotton accessible for removal. Leave room between the plug and the queen’s nesting area.
5. Add darkness and identification
Cover the nesting chamber with a removable opaque sleeve or loose foil wrap. Keep the entrance ventilated and make sure you can inspect the water reservoir without repeatedly uncovering the queen.
Label ant tubes with a colony ID, species or provisional identification and the setup date. Record the collection or arrival date separately if known. These notes help you distinguish normal development from changes that need investigation.
For a club collection, reusable fabric sleeves can carry a keeper or club name on custom woven labels. Sew these onto the outside of the sleeve, never inside the nest. Keep changing information, such as inspection dates, on a removable paper tag or in a notebook.
Avoid adhesive, ribbon or loose threads around the tube opening, where they could obstruct ventilation or snag an ant during handling.
6. Choose a stable resting place
Rest the tube horizontally in a quiet location, supported so that it cannot roll. Keep it away from direct sunlight, vibrating appliances and places where it will be knocked or frequently moved.
Use temperatures appropriate to the species and season. A sunny windowsill can overheat a tube even when the room feels comfortable. Do not apply direct heat to the reservoir or improvise a heating arrangement without species-specific guidance.
If other people or pets share the space, a ventilated secondary enclosure can help protect the setup from accidental disturbance. Our guide to creating a safe indoor home for ants covers broader placement and escape-prevention considerations.
Match feeding to the queen’s founding strategy
A correctly assembled nest does not make every queen’s care identical. For fully claustral species, a healthy founding queen typically raises her first workers using stored reserves, provided she has water and suitable conditions. Routine feeding may be unnecessary during this period.
Semi-claustral queens need access to appropriate food during founding. Depending on the species, a small, secure foraging area connected to the tube can make feeding safer and reduce repeated interference with the nesting chamber.
Keep food portions small and accessible, and remove leftovers before they spoil. Large liquid droplets can trap a queen or tiny workers. Wild-caught insects can introduce pesticides or other contaminants, so use appropriate feeder sources when insect food is required.
Once workers emerge, ant tubes can remain useful nests, but the colony’s feeding routine changes. Workers need access to suitable carbohydrates and the colony needs species-appropriate nutrition for brood growth. The guide to choosing ant food for each stage of colony growth explains that transition in more detail.
Inspect without repeatedly disturbing the queen
For a settled, fully claustral queen, a brief check about once a week is a reasonable starting point, adjusted for water levels, temperature and any developing problem. Semi-claustral queens also need feeding visits appropriate to their species.
Look at the reservoir before removing the cover. During a short inspection, check the queen’s condition, brood, cotton barrier and chamber floor. Avoid tapping the glass to provoke movement or handling the tube just to count eggs.
Keep a simple record of water level, feeding and major changes. Egg-to-worker development varies with species, temperature and season, so a generic deadline is not a reliable reason to disturb or relocate a queen.
Recognise problems that need action
Inspect ant tubes for changes in function, not just appearance. Cotton can become stained, but colour alone does not tell you whether a nest is safe or unsafe.
| Observation | Practical response |
|---|---|
| Water pooling in the nesting chamber | Prepare a safe replacement and arrange a prompt transfer |
| Reservoir nearly empty | Offer a fresh water-reservoir tube before the cotton dries completely |
| Uneaten food developing mould | Remove the food carefully and reduce future portions |
| Spreading growth or deteriorating water | Prepare a clean replacement and assess the queen’s condition |
| A small discoloured patch with otherwise stable conditions | Monitor its development rather than automatically forcing a move |
| Persistent heavy condensation or droplets | Check temperature fluctuations and overheating; address pooling promptly |
Do not add disinfectant, essential oils or mould treatments to an occupied nest. If the queen appears injured or repeatedly struggles with the setup, seek species-specific advice rather than making several changes at once.
Replace the tube before water becomes an emergency
A dwindling reservoir is a reason to prepare another nest, not to pour water into an occupied tube. Trying to refill behind the cotton can dislodge the barrier and flood the queen’s chamber.
Where practical, offer a fresh tube through a secure connection or place both tubes in an escape-resistant enclosure appropriate to the colony’s size. Keep the replacement covered and allow a voluntary move. Ordinary room light on the old tube may encourage relocation, but never use direct sun or heat to drive ants out.
Replacing ant tubes does not automatically mean upgrading to a formicarium. A queen and her first few workers may still be best housed in a small nest with access to a manageable feeding area. Move to a larger nest when colony size and species requirements justify it, not simply because the first workers have appeared.
Frequently asked questions
Should the cotton touching the queen be wet? The reservoir barrier should provide a damp surface, but the nesting chamber should not contain standing water. The entrance plug should be dry when installed and must not be used as the main water source.
Can I use a screw cap instead of cotton? Do not replace a breathable entrance plug with an airtight cap. Use cotton or a purpose-designed ventilated closure suitable for the queen’s size and escape risk.
How long do ant tubes last? There is no fixed service life. Reservoir size, temperature, ventilation and colony activity all affect water loss. Inspect the water level and prepare a replacement before it runs dry.
Should I move a queen that arrived with eggs? If her current tube is secure, adequately hydrated and free of urgent problems, leaving her settled is usually preferable to an unnecessary transfer. Ask the supplier about any transport-specific care instructions.
Get the setup right before choosing a larger farm
Start with a tested water barrier, a breathable entrance and care matched to your queen’s species. A small, stable nest is more useful than a complicated setup that needs constant adjustment.
If you need help choosing suitable supplies or planning the next stage, Ant Farms Calgary offers live colonies, starter kits and personalised recommendations. Share the species and colony stage so the advice fits the ants you are keeping.




Leave a comment